Hello Fresh, Hello Yes!

Family, meal planning, My Tasteful Life, Planning, tips

Parents everywhere are excited and a little overwhelmed as they get back into the school year routine. Between open houses, sports tryouts and the typical morning rush, what to have for dinner can be an afterthought. Wouldn’t it be great if healthy, fresh ingredients and clear recipes arrived at your door?

That’s where a meal delivery service, like HelloFresh, can come into play.
My good friend introduced me to this little luxury, and I’ve been pretty impressed with the freshness and quality of the ingredients. The recipes can make weeknight meals easier because you don’t have to come up with the idea and purchase the various ingredients. Even cooks like me will be impressed with the quality and variety that HelloFresh offers its clients.

Here’s how it works: you sign up and get your first box free. That box includes all the ingredients for three meals that feed two people. The box is well packed, and keeps everything cold. Each meal has a clearly written recipe, with pictures and nutritional values, that provides precise cooking instructions.

IMG_3225     IMG_3228

After your first free box, then you’re charged weekly for whatever amount you choose. The options feed either two or four people. You can easily put a week on hold (as long as you do so a week and a half before delivery) so that you don’t have food arriving when you’re on vacation or during a week that you don’t need the service.

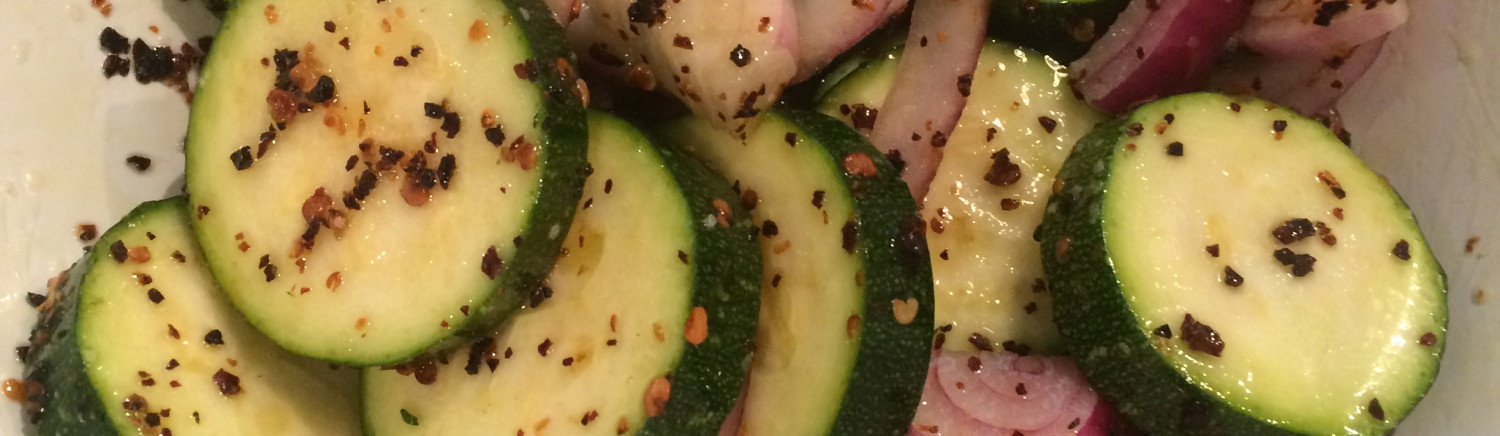
You can also pick your meals from different options the week before your delivery. This ensures that each box is perfect for your family. If you and your family don’t eat fish or need vegetarian options, then you can customize the box to fit your needs.

I’ve been most impressed with the types of recipes (great when you’re stuck in a cooking rut) and with the quality of the ingredients. HelloFresh has obviously partnered with some good brands and the mini condiments are not only tasty but also adorable.

There are other similar services out there like Blue Apron and Plated. I’ve only tried HelloFresh, and was honestly surprised that I liked it at all. As someone who enjoys cooking, I didn’t think I would need a service that spoon fed me ideas, recipes and ingredients. But I have to admit that some weeks my meals are less than inspired, and not having to plan for every night has its benefits.

Here are my overall findings. The pros: interesting meals, clearly written recipes containing all the nutritional information, and most recipes seem to stay between 400 and 600 calories per serving. Meals usually only require one pan for cooking, and the fresh ingredients get delivered to your home. The cons: it’s not cheap ($69/week for three meals feeding two people). Most recipes require a decent amount of prep-work for a weeknight meal, and you can’t choose your delivery day.

IMG_3250   IMG_3241   IMG_3245

Singles, young couples, empty nesters and families with a mix of vegetarians and meat eaters would truly benefit from something like HelloFresh. You will have to do some of the work, mostly chopping and cooking, but if you can prep your food before work or during a child’s nap, then you can have a delicious and healthy meal within 30 to 40 minutes that evening. Most recipes are made in one pan, which makes clean up a breeze.

So the next time you’re looking ahead on the calendar and see an upcoming crazy week, give a meal delivery service like HelloFresh, Blue Apron or Plated a try. You’ll be surprised at the inspired and delicious recipes you’ll put on the table.

Low-Carb Appetizer: Zucchini Parmesan Crisps

Appetizers, Herbs, Low-carb, My Tasteful Life, Party Planning, tips, vegetables

Do you ever have one of those fun and busy weeks that by Sunday afternoon you feel like you need another weekend? That’s how last week was for me. There were dinners out during the week, farmers’ market and a cookout with friends on Saturday, and then I spent Sunday helping out around my mom’s house.

By Sunday evening, I had no energy to cook and no desire to eat out. That’s when a stocked refrigerator is my best friend. Ummm … what do I have that isn’t a lot of work, that’s tasty, and that isn’t too far off from Paleo?

I found some sopressata (Italian dry cured pork similar to hard salami), a block of Irish cheddar cheese (I know it’s not Paleo but my house would revolt without a little cheese), and three fresh zucchinis from the farmer’s market. In my pantry, I located a can of olives and a bag of pistachios. IMG_3050

A cheese and meat board is simple and delicious, but I used this opportunity to do  something new with the zucchini. Since I wasn’t making a full dinner, I decided to try my hand at Zucchini Parmesan Crisps.

This simple recipe had been floating around the web for a while, and now was a perfect chance to try something new while sneaking veggies into my charcuterie and cheese plate.

On my first attempt, I was able to create a delicious and surprisingly healthy finger food. However, the zucchini rounds didn’t quite get crispy enough for my liking, probably because zucchinis naturally contain a lot of water. Don’t get me wrong – we ate all three zucchinis’ worth. However, I couldn’t help but think a slightly alternative prep work could have yielded a more delicate and crunchy texture.

Round two was more successful and that recipe is below. Make it tonight for a low-carb appetizer or keep it in mind the next time you need a vegetable to round out a meal or a table of finger foods.

Tools You’ll Need

Paper towel or hand towel

Baking sheets

Parchment paper or baking mat

Basting brush

Ingredients

3 medium to large zucchinis, sliced into 1/8” to 1/4″ thick rounds (this is a great time to use a mandolin slicer)   IMG_3018

2 tablespoons olive oil or coconut oil

4 tablespoons freshly grated Parmesan cheese

2 tablespoons your choice of herb (I use chives, parsley or basil)

1 scallion, green and white parts, chopped

1 teaspoon pepper, freshly cracked

1/4 cup Kosher salt

Process

Preheat the oven to 425 degrees. Mix cheese with pepper and herbs, set aside.

In a single layer, spread the zucchini rounds on a large paper towel or clean hand towel. Generously sprinkle the kosher salt over the zucchini. The salt helps draw out the moisture in the zucchini, which will help make it crisper.

IMG_3026     IMG_3056     IMG_3062

After 10-15 minutes, pat the zucchini dry, removing the majority of the salt. Then line a baking sheet with either the parchment paper or the baking mat, and place the zucchini rounds in a single layer on the baking sheet.

Using a basting brush, lightly spread the oil on top of the rounds. Then sprinkle with the cheese mixture. Bake on the center or upper third rack for about 30 minutes until they are crisp but not burned. Serve immediately and enjoy.

IMG_3032     IMG_3071     IMG_3041

Summertime Marinades: Snappy Lemon

Asian, grilling, Marinade, Paleo, Shellfish, tips

It’s summer, and it feels like it. That means my grill has been utilized nearly every night of the week. I just think food tastes better because of that open flame, and marinades can truly enhance an entire meal.

The real struggle comes when trying to find new marinades for your favorite grilled proteins. I honestly grill everything from steak to shrimp to vegetables. So I’ve developed a variety of easy homemade marinades that complement any meal.

Over the next few days, I’ll share four different recipes that can be used on practically anything. Experiment and try new proteins that you might not normally gravitate toward. You never know what new favorite you’ll whip up tonight. IMG_2695

The Snappy Lemon recipe below comes from my mom’s recipe book. It’s never failed me and offers a nice change to store-bought dressings used as a marinade. Try it tonight with grilled chicken or shellfish.


Snappy Lemon (best with chicken, skirt steak, seafood or shellfish)

Ingredients

1/4 cup reduced-sodium soy sauce (Coconut Aminos can be substituted)

2 tablespoons white wine

2 tablespoons lemon juice

1/2 teaspoon chili garlic sauce (you can find this in the Asian section at most grocery stores)

2 green onions, chopped

1 clove of garlic, finely chopped

Process

Mix all together in a bowl and place your protein into the mixture, and cover with lid or plastic wrap. Refrigerate 15-30 minutes (only 15 minutes for shellfish). Grill at 450 degrees until cooked through.

IMG_2693     IMG_2709     IMG_2711

Sautéed Spinach with Goat Cheese

10 minute side dish, food, Paleo, side dish, Spinach, tips, vegetables

In Florida, spinach and snap beans (a.k.a. green beans) reach their peak in March so you can buy a lot for a little bit of money (click here for a complete list of Florida vegetables by season). Both spinach and snap beans make healthy side dishes but sometimes we need inspiration to create something different. Steamed green beans get boring, and I don’t know about you, but I can only eat so much spinach in my salads.

Don’t let your side dishes end up as an obligatory sidekick to your meal’s main element. Instead, look for ways to doctor up the usual to create something new. The key to side dishes is that they can’t take up a lot of time. They are SIDE dishes, after all. But that doesn’t mean they can’t be fulfilling and add a satisfying element to your meal.

Below I’ve included a 10-minute recipe for spinach sautéed with garlic and goat cheese. It’s simple to prepare and is a great way to use all that spinach you picked up at the farmers market or store. Don’t forget that spinach shrinks dramatically as it cooks, so be prepared to use at least six to eight cups to feed four people.

I paired this luscious side dish with a grilled New York strip steak. I didn’t even miss eating the roasted potatoes I made my husband because the spinach had plenty of fulfilling flavor. Check back later this week to get another 10-minute side dish that’s perfect for a Paleo-inspired diet.

IMG_0364


Ingredients

2 tablespoons olive oilIMG_0348

2 garlic cloves, minced

1/4 cup onion, minced

1/4 teaspoon kosher salt

1/4 teaspoon white or black pepper

2 oz. goat cheese (use 1/4 oz. per cup of spinach)

6-8 cups fresh spinach

Cooking

Using a deep skillet or shallow pot, sauté garlic and onion in olive oil over medium-high heat for 3 minutes. Add the spinach and stir so every leaf is coated with the hot oil. Season with salt and pepper. Add cheese in chunks and gently combine. Turn off heat, cover, and let sit for 2 minutes. Stir again and serve immediately.

IMG_0351     IMG_0352     IMG_0356

Winter Vegetable Medley

Leftovers, Paleo, roasting, side dish, sunday supper, tips, vegetables

Parsnips and butternut squash abound this time of year, but it can be hard to come up with ideas to incorporate them. Most people haven’t cooked parsnips before and aren’t sure where to start. Parsnips look somewhat like white carrots, and you peel them the same way, but they have a distinct root vegetable flavor.

I am always trying to find ways to reduce the starches and incrIMG_0483ease the vegetables we eat. Butternut squash is one of those wonderful vegetables that has a similar texture and taste of a sweet potato, but isn’t as sugary. It doesn’t get stringy or watery like other types of squash sometimes do, so it really stands up to roasting.

With a couple of Yukon gold potatoes, these winter vegetables bake together and caramelize nicely. Even children don’t seem to notice how many vegetables they’re enjoying, so that’s another win when feeding a family.

This side dish recipe easily feeds four to six people. I was only serving three, so I wound up with enough left over for the next night. It’s really nice to have a significant part of today’s meal already completed. This savory vegetable and potato medley worked great with the pompano fish I grilled last night, and I’m sure it will pair perfectly with roasted lamb chops this evening.


Ingredients

3 garlic cloves, minced

1 shallot, chopped

2 medium Yukon gold potatoes

1 medium butternut squash

4 parsnips

2 teaspoons salt

1 teaspoon thyme

1/2 teaspoon white pepper

1/2 teaspoon garlic powder

3 tablespoons olive oil

3 tablespoons balsamic vinegar


Cooking

Preheat oven to 400 degrees. Peel parsnips like you would peel a carrot, then slice into 1/4-inch slices. Remove the skin from the squash by carefully cutting between the skin and the orange flesh. Then remove the seeds and stringy inside, like you would if you were cleaning out a pumpkin. Then cut squash into 1/2-inch chunks. Cut potatoes into 1/2-inch chunks as well.

IMG_0462

Mix the minced garlic and shallots with the parsnips, squash and potatoes in a large bowl. Add olive oil, salt, garlic powder, white pepper and thyme and stir. Place the medley on a greased cookie sheet in single layer. Bake for 20 minutes and stir.

IMG_0468

Bake for another 15 minutes. Pour balsamic vinegar over the vegetables and gently combine. Cook for 5 more minutes and serve when ready.

IMG_0478

Chicken Enchiladas

Chicken, Leftovers, meal plans, Mexican, sunday supper, tips

I’m not a huge fan of leftovers in their original form, but I enjoy making another meal with the remainders. My chicken enchiladas are a good example of this practice. By using leftover shredded Mexican chicken, I can throw together a meal that looks almost professional. Assembling the enchiladas is easy, and I like to serve them with some yellow rice. Start the rice just before you place the enchiladas in the oven and everything will be done at the same time. Enjoy!

IMG_0156


Supplies You Will Need

9×13 baking dish


Ingredients

1-2 cups leftover Mexican chicken

1-2 cups shredded cheddar cheese

10 oz. can of enchilada sauce (I use Old El Paso)

6-8 tortilla shells from the night before

.5 oz. package of saffron yellow rice


Cooking

Preheat oven to 425°F. Spray baking dish with cooking spray and spread 1/4 cup of enchilada sauce on the bottom.

Carefully assemble the enchiladas by placing 2 to 3 tablespoons of chicken in the center of each tortilla shell. Top with a little cheese and fold one side over the other. Place the enchilada seam side down in the baking dish. Repeat until the pan is full. The enchiladas should touch each other but not be crammed in.

IMG_0136

Bake for 15 minutes. Top with 1/4 cup of enchilada sauce and 1/2 cup of cheese and cook for another 10 minutes until cheese is melted and bubbly. Feel free to top these with any of the traditional taco toppings. Serve with rice and enjoy!

IMG_0147


[FBW]

One Slow Cooker, Two Mexican Meals

Chicken, meal plans, Mexican, Slow cooker, sunday supper, tips

I like all different types of food and do my best to make a good variety of meals. My husband loves Mexican but it’s not always the best choice for our waistlines. However, I’ve found a quick way to make some delicious chicken that can be used in both tacos and enchiladas.

IMG_0124

This shredded Mexican chicken recipe is as simple as it gets, to me anyway. It’s not only easy but it’s pretty healthy. The chicken recipe only uses four main ingredients, so the majority of calories comes from the taco shells and toppings you choose.

This recipe works great on salads too. Add a little cheese, some canned black beans, corn, fresh tomatoes, avocado, a few crumbled taco chips and two tablespoons of salsa. For those of us who need to watch our portions, this is a hearty salad that doesn’t taste like you’re missing anything while the rest of the table gobbles down tacos.

One of the best parts of this recipe is its leftovers. This easily feeds six people and you should still have some remaining. Either eat tacos again the next night, or better yet, try my enchilada recipe. Check back tomorrow to see how to make restaurant-quality enchiladas with the leftover chicken and tortilla shells from the night before and only three more ingredients.


IngredientsIMG_0095

6 chicken breasts

1 large onion, quartered

1 jalapeno pepper, halved

1 cup of your favorite salsa (I prefer “hot” varieties)

1 teaspoon kosher salt

1 teaspoon cuminIMG_0116

(15-20) 8”-12” flour or corn tortillas

Taco toppings of your choice (I suggest shredded cheese, chopped tomatoes, sliced avocado, cilantro and shredded iceberg lettuce)


Cooking

Clean and trim chicken breast to remove any visible fat. Cut each breast in half. Place at the bottom of a greased slow cooker. Top with jalapeno pepper and onion. Sprinkle with salt and cumin. Cover with salsa. Cook on high for 3-4 hours or on low for 6-7 hours.

IMG_0101


Carefully remove the chicken and leave the sauce in the crock pot. Place the chicken on a cutting board and gently shred the chicken with two forks. Remove half of the cooking liquid. Return the shredded chicken to the slow cooker and mix. Serve immediately or keep chicken warm until ready to assemble the tacos.

IMG_0105


*Tip: try heating the tortillas on medium-high heat in a dry pan for 30-45 seconds on each side but be careful not to burn them. This extra step helps keep the tortillas from getting soggy and also adds a nice crisp.


 [FBW]


Pork Chops with Black-Eyed Peas and Kale

black-eyed peas, food, grilling, kale, pork, spices, sunday supper, tips, vegetables

I have a confession: I don’t like kale. Gasp! I know it was all the rage, and I’ve really tried to enjoy it since it’s kale season. I’ve sautéed it with garlic and good olive oil. I’ve bought kale chips and went as far as making a batch of them myself at home. I’ve sliced it thin and added it to my salads, but I just can’t get on board with the tough, chewy texture of the leaves. That is until last weekend when I added it to my black-eyed peas and voila! Deliciousness!

This black-eyed peas recipe goes great with seasoned pork chops. Start the peas early because they take about an hour and 30 minutes, and I suggest using a 5-quart pot because the four to six cups of kale take up some space initially.

One secret to this recipe is a special spice mix made by Tasty Licks BBQ Company. I have four favorite combinations, and I’ve included a picture here. For this meal I use some of the “Flyin’ Swine Pork Rub” and “Mella Yella.” Not only do I use them for the pork chop rub and marinade, but I also add the “Flyin Swine” to the black-eyed peas.IMG_0006

It’s no problem if you don’t have any Tasty Licks seasonings. Just mix a 1/4 cup of brown sugar with a teaspoon each of chili powder, black pepper, onion powder, lemon pepper and garlic salt. This mix replaces the Flyin’ Swine and Mella Yella. If pork isn’t your thing, try this with chicken breasts.

Below I’ve included recipes for the black-eyed peas and pork chops, and this meal serves four adults. Don’t be startled by the list of ingredients! Everything but the pork chops cook together so I consider this a one-pot recipe that’s jammed full of vegetables.


Black-Eyed Peas IngredientsIMG_0021

1/4 pound chopped pancetta

1 cup chopped celery

1-1/2 cups chopped carrots

1 large onion, chopped

4 to 6 cups chopped kale

1-pound bag of frozen black-eyed peas

3 teaspoons chili powder

2 teaspoons cayenne pepper

3 teaspoons cumin

2 tablespoons kosher salt

2 cups chicken broth

2 tablespoons Flyin’ Swine Pork Rub

CookingIMG_0031

Sauté pancetta over medium heat in a 5-quart pot until brown and crispy. Remove pancetta but keep the renderings. Place pancetta on a paper towel to drain excess fat, and set aside.

Cook the onions, celery and carrots in the oil from the pancetta for 5 minutes. Add the chili powder, cayenne pepper, cumin, salt and the Flyin’ Swine Pork Rub and mix well. Then add the bag of frozen black-eyed peas, kale, the cooked pancetta and 1 cup of the chicken broth. Mix well, cover and simmer on low for 1 hour and 30 minutes, stirring occasionally and adding the last cup of chicken broth as the liquid is absorbed.


Seasoned Pork Chops Ingredients 

(4) 1” thick boneless pork chops

2 tablespoons Flyin’ Swine Pork RubIMG_0039

2 tablespoons Mella Yella Lemon Pepper Spice Rub

2 tablespoons olive oil


Cooking

IMG_0043Mix the 4 tablespoons of spices with the 2 tablespoons of olive oil. Use the mixture to coat both sides of the pork chops and let sit for 30 minutes. Cook on a 450-500 degree grill for 4 minutes per side. Loosely cover with foil and let rest 5 minutes before serving. Pour remaining juices over chops and serve with black-eyed peas.

IMG_0052


Sensational Salads

food, meal plans, salads, tips

When we are trying to eat healthy we tend to eat a lot of salads. However, most people get tired of their same old salad by day four. Mixing up a new recipe is easier than you think, and I’ve included five tricks below to turn a side salad into a main course.

  1. Add some crunch. Shelled sunflower seeds, walnuts, almonds, croutons, wontons, and tortilla chips are all great ways to add texture. If you’ve got some stale bread, chop it up and toss with olive oil and herbs. Bake at 375 degrees for 15 minutes and you have homemade croutons!

IMG_6630

2. Mix up the greens. Instead of a head of iceberg or a bag of romaine try using butter lettuces or a spring mix. Toss in some spinach to up the iron content or add arugula to give it more flavor.

00530322

3. Vary your protein. I like to use all types of protein in my salads so that they are unique and can keep my interest. Grilled marinated chicken, skirt steak or fish all work great on greens. So do bacon, pancetta, salami and hard boiled eggs. Edamame and avocados are also good choices for my vegetarian friends.

00640334

4. Try new dressings. It’s easy to grab “the usual” at the store but there are so many choices out there. Some of my favorite pre-made salad dressings include Makoto’s Ginger Dressing, Marzetti’s Simply Dressed Light Balsamic, and Naturally Fresh Lite Ranch. Of course homemade dressings are usually healthier so try different types of vinegars or a teaspoon of Dijon mustard mixed with some herbs and a good olive oil to create something new.

IMG_9954

5. Cheese, please. I’m not advocating putting a cup of cheese on a few pieces of lettuce, but a little cheese can go a long way in transforming a boring salad. Try some reduced fat feta or toss in some fresh mozzarella. Pick a cheese that goes with the flavors of the salad, and it will be another satisfying element.


cropped-IMG_9960.jpg

Combining any number of the tips above will upgrade your usual salad recipe. To make the most of all the chopping and washing, I assemble extra salads in mason jars. Believe it or not but those “salads in a jar” last up to five days in the refrigerator! Check out this link to get the assembly instructions, and you’ll find yourself eating more salads than expected because they are ready to go and waiting for you.

Roasted Chicken with Potatoes and Carrots

gravy, roasting, sunday supper, tips, vegetables

This classic recipe is perfect for a Sunday supper. It takes some prep work but the finished product tastes outstanding, smells amazing and is the ultimate comfort food. The carrots and potatoes are added during the last 45 minutes of roasting, which helps make this a one-pot meal. Well, if you don’t count the prep work…  IMG_8842

It’s also a great meal because everyone in the family enjoys it. My daughter likes the chicken and carrots, and my husband craves the potatoes and gravy. Men LOVE gravy. A lot of people fear making it. But don’t be afraid! It’s simpler than most people think, and I’ve included how to make it below.

This classic recipe deserves a crisp sauvignon blanc or a chardonnay to complement the meal. I chose Mohua, a sauvignon blanc from Marlborough, New Zealand. For a wine with more body, I recommend unoaked chardonnays from either Kim Crawford or Villa Maria. Any of these whites will provide a nice balance to the richness of the gravy.

You may end up with some leftovers depending on how many people you’re serving. This meal typically yields dinner for four and a good amount of leftover shredded chicken. That’s some tasty rewards for my earlier labor! Check back tomorrow to get my “easy chicken salad” recipe that’s perfect for quick lunches.

This recipe looks long, but if you’ve got the time, then it’s totally worth it. I’m salivating a little bit just smelling the sage and thyme so thank goodness I’ve already poured myself a glass of wine.

Supplies You Will Need
Roasting pan (I use a 16” x 13” roasting pan)
Twine
Baster

IngredientsIMG_8833
(1) 5-7 pound roaster chicken
Fresh sage
Fresh thyme
4 tablespoons butter at room temperature, divided
2 medium onions, sliced into 1/4″ wide slices
4 garlic cloves (3 whole, 1 pressed)
1 lemon
4 cups chicken broth
2 cups baby carrots
3 cups small Yukon gold potatoes
Kosher salt
Black pepper

Gravy Ingredients
2 tablespoons all-purpose flour
2 tablespoons butter
Renderings from the roasted chicken
1 cup of chicken broth (if needed)
Salt and pepper to taste

Preparation
Preheat the oven to 425° and put rack on second lowest position in the oven. Spray roasting pan with cooking spray. Place 6 to 8 onion slices touching side by side in the center of the roasting pan. The chicken will eventually sit on top of the onions.

Chop 4 sage leaves and the leaves of 5 thyme sprigs, and combine in a small bowl with one pressed garlic clove and 3 tablespoons of room-temperature butter. Set aside.

Create a small bundle with thyme and sage and secure with twine. Remove the outer layer of the remaining 3 garlic cloves. Gently roll the lemon to release its juices and then poke it a few times with a fork.

IMG_8840Wash the chicken thoroughly with cold water and pat dry. Make sure the neck and giblets have been removed. Generously sprinkle chicken inside and out with salt and pepper.

Place the 3 garlic cloves, the whole lemon, one tablespoon of butter and herb bundle into the cavity of the bird. Bring the legs together and tie with twine. Lather the outside of the chicken with the herb butter mixture from step 2, and place the chicken breast side up on the onion slices in the roasting pan. Sprinkle with a little more salt and pepper.

Cooking
Cook at 425° for 20 minutes and then reduce the heat to 350°. Gently pour 2 cups of chicken broth into the bottom of the pan. Cook for 1 hour, basting and adding 1/2 cup of chicken broth every 30 minutes. Rotate the roaster in the oven at some point.

Then add the carrots to one side of the roasting pan and the potatoes to the other. Cook for 25 minutes, then gently stir the vegetables without disturbing the bird. Add 1/2 cup of chicken broth to the pan. Cook for another 20 minutes.

Remove roasting pan from the oven and carefully take out the chicken and put it on a cutting board or platter. Remove the items inside the bird and let it rest 10 minutes before carving. Remove the carrots and potatoes and cover to keep them warm. Put the onion slices in a strainer and gently press with a spoon over a bowl to remove any extra liquid. Retain the liquid, but throw away the onions.

IMG_8843To make gravy, strain the liquid from the roasting pan and combine it with the liquid from the onions. Scrape off the black spots on the roasting pan and put it on the stove top. Melt 2 tablespoons of butter on medium-low heat and add 2 tablespoons of flour, mixing well until combined. Slowly add the strained liquid back into the pan. Increase heat to medium and stir continually until the gravy is slightly thickened. You can add more chicken broth if it gets too thick.

Carve chicken and serve with vegetables and gravy. Enjoy!

IMG_8844